Felt Card Holder Tutorial
In my textiles arts and crafts class last year, we made felt holders for a project.
The light green branches/leaves are an upside down fern stitch with pink & light yellow french knots as flowers.
(I don't really know what I was trying to do here, it looked better in my mind x_x
I think I was trying to imitate a garden with an archway that has hanging plants.)
The top stitch is a simple gold back stitch with a maroon pekinese stitch.
The main stitch is two maroon back stitches with a gold herringbone stitch (embroidered only in the back stitch and not in the actual felt) and a gold pekinese stitch on the top.
The pink at the bottom left corner are multiple french knots to look like roses/flowers.
The pink at the bottom left corner are multiple french knots to look like roses/flowers.
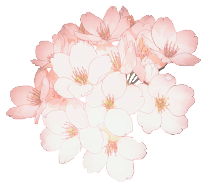
The light pink felt flower was made from a tutorial I saw on Martha
Stewart's website. In the middle of the flower are multiple french
knots.
A blanket stitch was used to join the felt together.
The left pocket is horizontal while the right pocket is vertical.
MATERIALS:
- Felt, 6 piece embroidery thread, sewing needle, pins, a button, ruler and scissors.
Quick How-To Make/Instructions:
1. Measure how large you want the holder to be based on what you will be using it for (phone/MP3/cards etc)
Cut out 2 of the felt sizes (You will only be decorating/sewing 1 of the felt pieces so you can hide your embroidery with the other)
2. Measure & cut out your pocket sizes. (Optional: Blanket stitch the side of the pockets that will be open for decoration purposes.)
3. Embroider/sew decorations. (french knots, herringbone stitch, pekinese stitch, fern stitch, back stitch, etc)
4. Sew a button on one end & sew on a felt piece with a hole on the other end to be able to close the card holder when folded. (Optional: Use an elastic instead of a felt piece.)
5. Pin everything in place & do a blanket stitch all around to cover the raw edges. Try to keep your stitches as even & consistent as possible.
I actually don't have much use for this felt holder, but it was a fun way to practice & try new stitches.


0 comments:
Post a Comment